 An early draft of this guide was written by Ethan Zuckerman on April 13, 2005 and updated on October 1, 2006. On August 8, 2007 Global Voices Advocacy published an updated and linkable, blogging-friendly, HTML version of the guide, along with a downloadable PDF file. On March 10th, 2009, the guide has been updated once again so that all the tips are also compatible with Tor's recent update.
By Ethan Zuckerman
Introduction
An early draft of this guide was written by Ethan Zuckerman on April 13, 2005 and updated on October 1, 2006. On August 8, 2007 Global Voices Advocacy published an updated and linkable, blogging-friendly, HTML version of the guide, along with a downloadable PDF file. On March 10th, 2009, the guide has been updated once again so that all the tips are also compatible with Tor's recent update.
By Ethan Zuckerman
Introduction
Disclaimer
I - Writing from shared computers
Zero Install Bundle for Windows (for any portable media drive)
a) Download Tor Browser Bundle
b) Extract the Tor Browser file in your USB key
II - Writing from your personal computer
Step 1: Disguise your IP
a) Install Firefox.
b) Install Tor.
c) Install Torbutton.
d) Turn on Tor in Firefox and test it out.
What if Tor never connects?
Step 2: Generate a new, hard to trace email account.
a) Choose a webmail provider.
b) Sign up for a new email account
c) Make sure you’re able to log onto the mail service.
Step 3: Register your new anonymous blog.
a) Turn Tor on in your browser.
b) WordPress activation link.
Log into your new blog.
Step 4: Post to your blog.
a) Write your blog post offline.
b) Log onto WordPress.com.
Edit Timestamp.
Step 5: Cover your tracks
a) Securely erase the rough drafts
b) Clear your browser history, cookies and passwords from Firefox.
Some parting thoughts.
A final thought on anonymity.
Show your support!Introduction
One of the great joys of working on
Global Voices has been having the chance to work with people who are expressing themselves despite powerful forces working to keep them silent. I’ve worked with a number of authors who’ve wanted to write about political or personal matters online, but who felt they couldn’t write online unless they could ensure that their writing couldn’t be traced to their identity. These authors include human rights activists in dozens of nations, aid workers in repressive countries as well as whistleblowers within companies and governments.
I wrote
a technical guide to anonymous blogging some months back and posted it on Global Voices, outlining several different methods for blogging anonymously. Since then, I’ve led workshops in different corners of the world and have gotten comfortable teaching a particular set of tools - Tor, WordPress and various free email accounts - which used in combination can provide a very high level of anonymity. The guide that follows below doesn’t offer you any options - it just walks you through one particular solution in detail.
You can feel free to ignore the “why” sections of the guide if you want a quicker read and if you’re the sort of person who doesn’t need to know why to do something. I hope to format this more prettily at some point in the future, allowing the “why” sections to be expanded and compressed, making the whole document a lot shorter.
If I’ve been unclear somewhere in the document or got something wrong, please let me know in the comments - this is a draft which I hope to clean up before posting it on Global Voices. Should you find it useful and want to disseminate it further, feel free - like almost everything on this site, it’s licensed under a
Creative Commons 2.5 Attribution license, which means you’re free to print it on coffee cups and sell them, if you think there’s a market and money to be made.
DisclaimerIf you follow these directions exactly, you’ll sharply reduce the chances that your identity will be linked to your online writing through technical means - i.e., through a government or law enforcement agency obtaining records from an Internet Service Provider. Unfortunately, I cannot guarantee that they work in all circumstances, including your circumstances, nor can I accept liability, criminal or civil, should use or misuse of these directions get you into legal, civil or personal trouble.
These directions do nothing to prevent you from being linked through other technical means, like keystroke logging (the installation of a program on your computer to record your keystrokes) or traditional surveillance (watching the screen of your computer using a camera or telescope). The truth is, most people get linked to their writing through non-technical means: they write something that leaves clues to their identity, or they share their identity with someone who turns out not to be trustworthy. I can’t help you on those fronts except to tell you to be careful and smart. For a better guide to the “careful and smart” side of things, I recommend EFF’s “
How to Blog Safely” guide.
Onto the geekery:
I - Writing from shared computers
If you’re going to be writing primarily from shared computers (like cybercafe computers) or you’re unable to install software on a computer, please follow the steps below to run Tor Browser Bundle without needing to install any software.
In case you'll be blogging primarily from your personal computer, where you can install software, please refer to the chapter II.
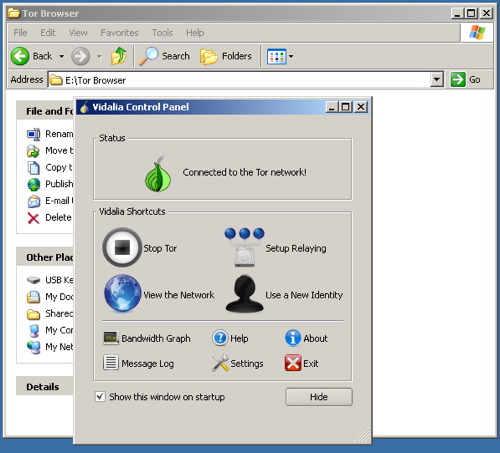
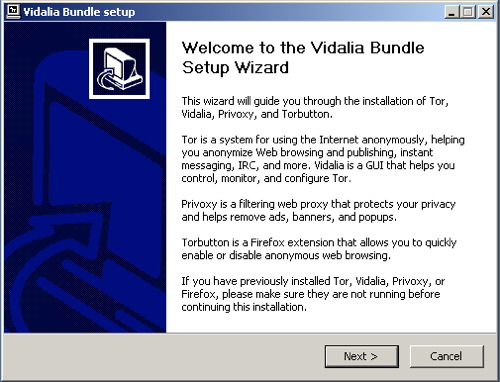
Zero Install Bundle for Windows (for any portable media drive)We recommend that you download the Zero Install Bundle for Windows, a great pre-configured Tor bundle with self contained Mozilla Firefox browser for USB drives or any portable media (SD Card, Hard Drives, Compact Flash Card). Tor Browser is an open source version of a portable browser developed by Tor Project. It is a highly customized version of the Firefox browser with Tor, Vidalia, caching http proxy called Polipo, Firefox, and Torbutton already installed. It’s designed to be placed on a USB key so that you can access Tor from shared computers that don’t permit you to install software.
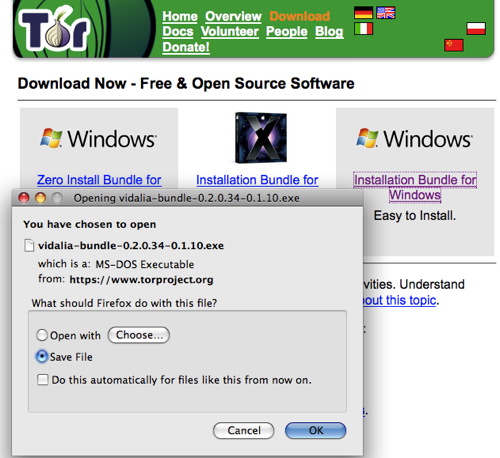
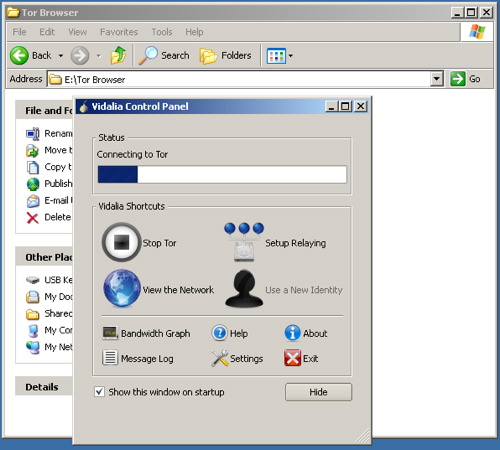
a) Download Tor Browser Bundle. Download the package for your preferred language from the Tor project website onto a computer where you can save files. Insert your USB key and copy the Tor Browser Bundle onto the key. Using this USB key and any Windows computer where you can insert a USB key, you can access a Tor-protected browser. On this shared computer, quit the existing web browser. Insert the key, find the key’s filesystem on the Desktop, and double-click the Start Tor Browser.exe. The Vidalia window will shortly appear.
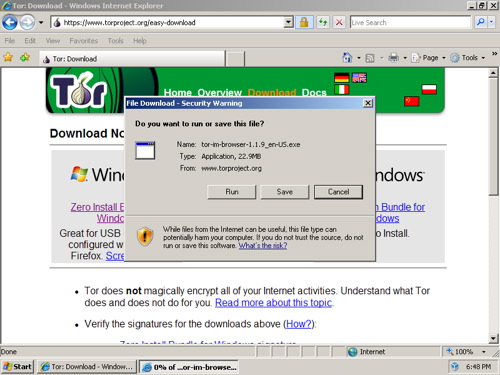
Remember that you can download Tor Browser Bundle from
Tor project website or choose the package for your
preferred language from
Tor Browser Bundle download page.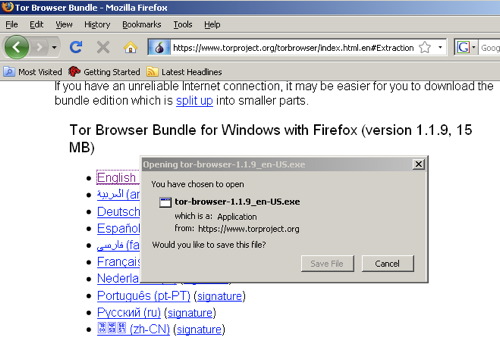
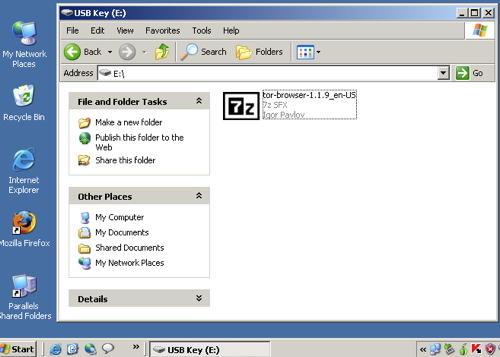
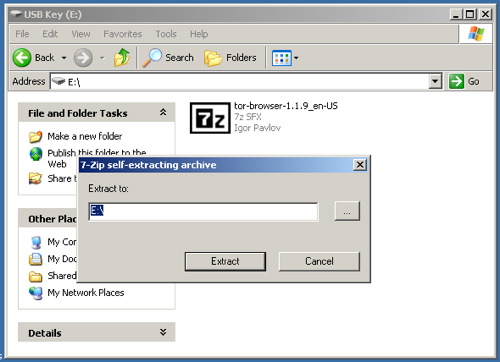
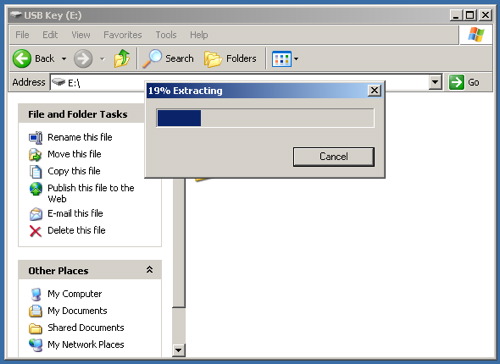
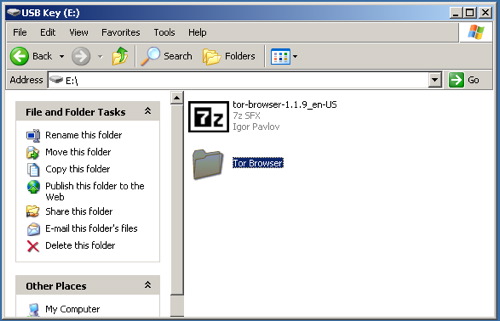
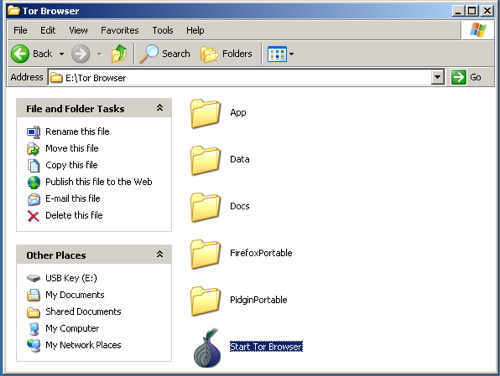
 b) Extract the file in your USB key
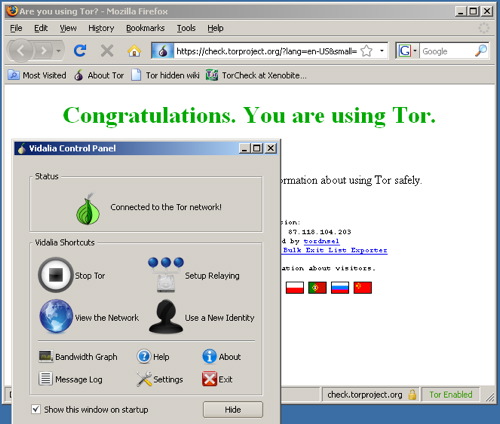
, open the “Tor Browser” folder and click on the “Start Tor Browser”. After connecting to the Tor Network, Tor-enabled Firefox browser will start automatically by visiting the
Tor Test page. Make sure you get a “ Congratulations. You are using Tor.” message.
Otherwise you will get this message telling you that “Sorry. You are not using Tor. If you are attempting to use a Tor client, please refer to the
Tor website and specifically the
instructions for configuring your Tor client.”
 II - Writing from your personal computer
Now, if you will be blogging primarily from your personal computer, where you can install software, please follow the steps below.
Step 1: Disguise your IP.
Every computer on the internet has or shares an IP address. These addresses aren’t the same thing as a physical address, but they can lead a smart system administrator to your physical address. In particular, if you work for an ISP, you can often associate an IP address with the phone number that requested that IP at a specific time. So before we do anything anonymous on the Internet, we need to disguise our IP.
What to do if you want to blog from your home or work machine:
a) Install Firefox. Download it at
the Mozilla site and install it on the main machine you blog from.
Why?
Internet Explorer has some egregious security holes that can compromise your online security. These holes tend to go unpatched for longer on IE than on other browsers. (Don’t believe me?
Ask Bruce Schneier.) It’s the browser most vulnerable to spyware you might inadvertently download from a website. And many of the privacy tools being released are being written specifically to work with Firefox, including Torbutton, which we’ll be using in a future step.
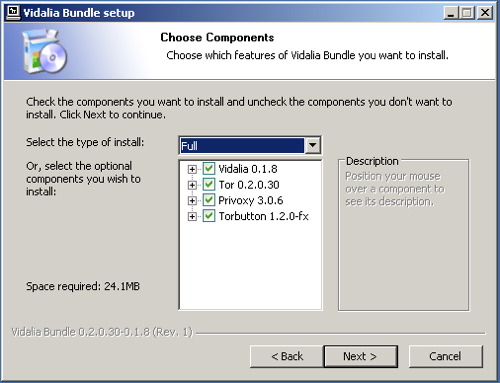
b) Install Tor. Download the program from the
Tor site. If access to Tor main website is blocked in your country, there are a
few mirrors of it in other places where it can also be downloaded from. You can also go to googl cache for viewing the mirrors page by googling for “
site:torproject.org mirrors“. Pick the “latest stable release” for your platform and download it onto your desktop. Follow the instructions that are linked to the right of the release you downloaded. You’ll install two software packages and need to make some changes to the settings within your new installation of Firefox.
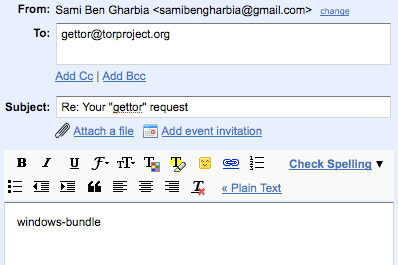
In case your internet connection blocks access to the Tor website, you can request a bundle by sending an email to the “gettor” robot at
gettor [AT] torproject [DOT] org. Remember that the emails to gettor@torproject.org has to come from
Gmail, otherwise they won't get a response. Select one of the following package names and put the package name anywhere in the body of your email:
- tor-im-browser-bundle
- windows-bundle
- panther-bundle
- tor-browser-bundle
- source-bundle
- tiger-bundle
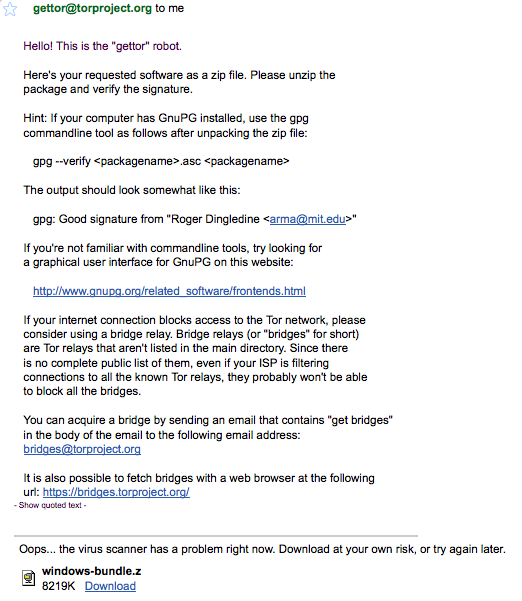
Shortly after sending your email, you will receive an email from “Gettor” robot with the requested software as a zip file. Unzip the package and verify the signature.
 Why?
Why?
Tor is a very sophisticated network of proxy servers. Proxy servers request a web page on your behalf, which means that the web server doesn’t see the IP address of the computer requesting the webpage. When you access Tor, you’re using three different proxy servers to retrieve each webpage. The pages are encrypted in transit between servers, and even if one or two of the servers in the chain were compromised, it would be very difficult to see what webpage you were retrieving or posting to.
Tor installs another piece of software,
Privoxy, which increases the security settings on your browser, blocking cookies and other pieces of tracking software. Conveniently, it also blocks many ads you encounter on webpages.
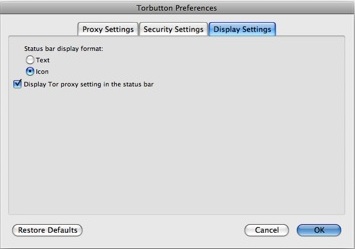
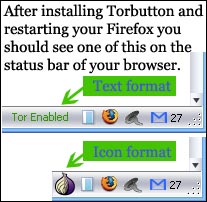
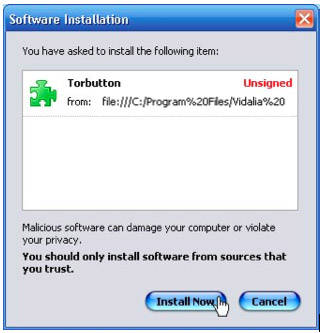
c) The bundle installs also the Torbutton Firefox plugin for you. It will simply ask you for permission to install itself from the downloaded package. Click “Install Now”, restart your Firefox, and you're all set:
 Why?
Why?Turning on Tor by hand means remembering to change your browser preferences to use a proxy server. This is a muiltistep process, which people sometimes forget to do. Torbutton makes the process a single mouse click and reminds you whether you’re using Tor or not, which can be very helpful.
You may find that Tor slows down your web use - this is a result of the fact that Tor requests are routed through three proxies before reaching the webserver. Some folks - me included - use Tor only in situations where it’s important to disguise identity and turn it off otherwise - Torbutton makes this very easy.
d) Turn on Tor in Firefox and test it out.
With Tor turned on, visit
this URL (https://check.torproject.org/). After clicking, if you get this message telling you, “Congratulations. You are using Tor. Please refer to the
Tor website for further information about using Tor safely.”, then you’ve got everything installed correctly and you’re ready for the next step.
Otherwise you will get this message telling you “Sorry. You are not using Tor. If you are attempting to use a Tor client, please refer to the
Tor website and specifically the
instructions for configuring your Tor client.”
Why?It’s always a good idea to see whether the software you’ve installed works, especially when it’s doing something as important as Tor is. The page you’re accessing is checking to see what IP address your request is coming from. If it’s from a known Tor node, Tor is working correctly and your IP is disguised - if not, something’s wrong and you should try to figure out why Tor isn’t working correctly.
What if Tor never connects? FAQ about problems with running Tor properly. In case your internet connection blocks access to the Tor network and in case the Vidalia onion icon in the system tray is always yellow, you may consider using
bridge relays. This would be the next logical step to get you connected to the Tor network.
If you have problems connecting to the Tor network you should read the
Bridge relays (or “bridges” for short) are Tor relays that aren't listed in the main Tor directory. Since there is no complete public list of them, even if your ISP is filtering connections to all the known Tor relays, they probably won't be able to block all the bridges. If you suspect your access to the Tor network is being blocked, you may want to use the bridge feature of Tor.”
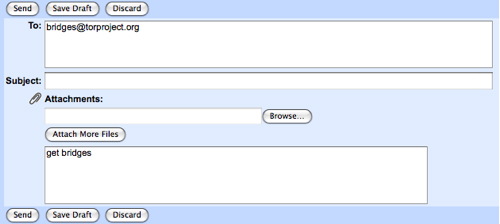
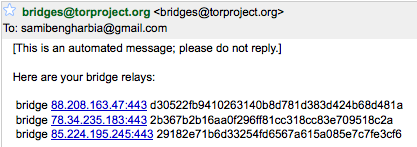
You can get bridged by sending an email, from a gmail account, containing “get bridges” in the body of the email to the following email address bridges@torproject.org. Shortly after, you will receive an automatic message with the bridges. It is also possible to acquire bridges from the following url:
https://bridges.torproject.org/
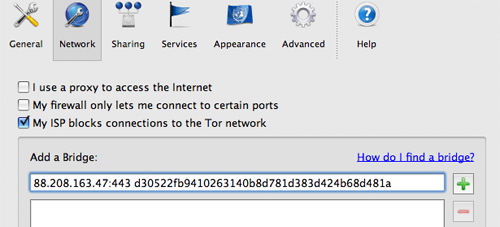
Open Vidalia's conrol Panel, go to Settings > Network and click “My ISP blocks connections to the Tor network”. Add each bridge address one at a time by pasting it into the “Add a Bridge” window and then clicking the “+” sign.
Step 2: Generate a new, hard to trace email account.Most web services - including blog hosting services - require an email address so that they communicate with their users. For our purposes, this email address can’t connect to any personally identifiable information, including the IP address we used to sign up for the service. This means we need a new account which we sign up for using Tor, and we need to ensure that none of the data we use - name, address, etc. - can be linked to us. You should NOT use an existing email account - it’s very likely that you signed up for the account from an undisguised IP, and most webmail providers store the IP address you signed up under.
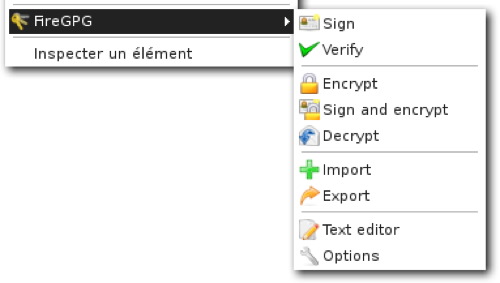
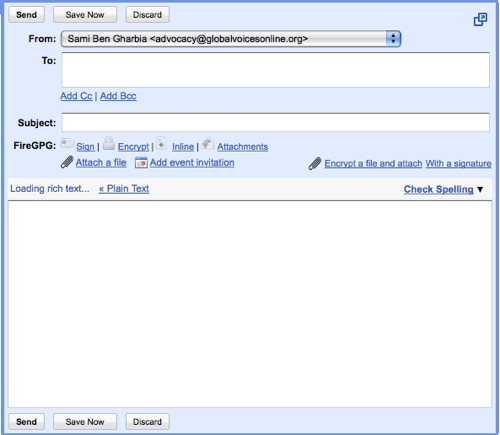
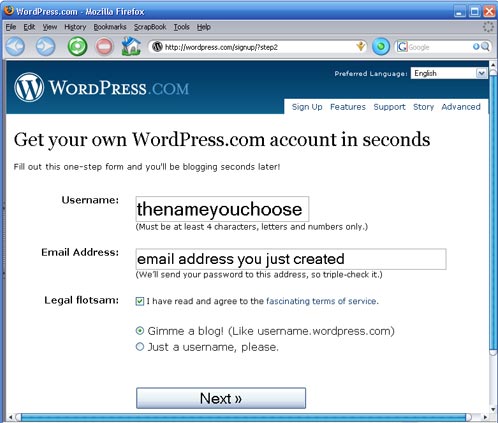
a) Choose a webmail provider - we recommend Riseup.net and Gmail, but as long as you’re using Tor, you could use Yahoo or Hotmail as well. Also, you can easily register a free and quick webmail account with fastmail.fm. Why? Webmail is the best way to create a “disposeable” email address, one you can use to sign up for services and otherwise ignore. But a lot of users also use webmail as their main email as well. If you do this, it’s important to understand some of the strengths and weaknesses of different mail providers.Hotmail and Yahoo mail both have a “security feature” that makes privacy advocates very unhappy. Both include the IP address of the computer used to send any email. This isn’t relavent when you’re accessing those services through Tor, since the IP address will be a Tor IP address, rather than your IP address. Also, Hotmail and Yahoo don’t offer secure HTTP (https) interfaces to webmail - again, this doesn’t matter so long as you use Tor every time you use these mail services. But many users will want to check their mail in circumstances where they don’t have Tor installed - for your main webmail account, it’s worth choosing a provider that has an https interface to mail.Riseup.net provides webmail with a very high degree of security. They support PGP encryption (Pretty Good Privacy)- which is very useful if you correspond with people who also use PGP. You can sign up for a free account at https://mail.riseup.net/ and ask your correspondents (recipients) to register a free account as well.Gmail, while it doesn’t advertise itself as a secure mail service, has some nice security features built in. If you visit this special URL (https://mail.google.com/mail), your entire session with Gmail will be encrypted via https. You can also visit https://mail.google.com/mail/h/ a secure SSL Gmail webmail that automatically load into Basic HTML interface. (I recommend bookmarking that URL and using it for all your Gmail sessions.) Gmail doesn’t include the originating IP in mail headers, and you can add PGP support to Gmail by using the FireGPG, a Firefox extension that adds strong crypto to Gmail. FireGPG brings an interface to encrypt, decrypt, sign or verify the signature of text in any web page using GnuPG. A warning on all webmail accounts - you’re trusting the company that runs the service with all your email. If that company gets hacked, or if they are pressured by other governments to reveal information, they’ve got access to the text of all the mails you’ve received and sent. The only way around this is to write your mails in a text editor, encrypt them on your own machine using PGP and send them to someone also using PGP. This is way beyond the level of secrecy most of us want and need, but it’s important to remember that you’re trusting a company that might or might not have your best interests at heart. Yahoo, in particular, has a nasty habit of turning over information to the Chinese government - Chinese dissidents are now suing the company for illegal release of their data. Just something to think about when you decide who to trust…b) Turn Tor on in your browser, or start Tor Browser from your USB key. Visit the mail site of your choice and sign up for a new account. Don’t use any personally identifiable information - consider becoming a boringly named individual in a country with a lot of web users, like the US or the UK. Set a good, strong password (at least eight characters, include at least one number or special character) for the account and choose a username similar to what you’re going to name your blog.c) Make sure you’re able to log onto the mail service and send mail while Tor is enabled. It is most likely that Tor changes its circuit every 10 minutes and this could disrupt your webmail operations, so you should consider limiting the process of writing a new email to 10 minutes.Step 3: Register your new anonymous bloga) Turn Tor on in your browser, or start start Tor Browser Bundle. Visit WordPress.com and sign up for a new account by clicking the “Get a New WordPress Blog” link. Use the email address you just created and create a username that will be part of your blog address: thenameyouchoose.wordpress.comb) WordPress will send an activation link to your webmail account. Use your Tor-enabled browser to retrieve the mail and follow that activation link. This lets WordPress know you’ve used a live email account and that they can reach you with updates to their service - as a result, they’ll make your blog publicly viewable and send you your password. You’ll need to check your webmail again to retrieve this password.c) Still using Tor, log into your new blog using your username and password. Click on “My Dashboard”, then on “Update your profile or change your password.” Change your password to a strong password that you can remember. Feel free to add information to your profile as well… just make sure none of that information is linked to you!Step 4: Post to your bloga) Write your blog post offline. Not only is this a good way to keep from losing a post if your browser crashes or your net connection goes down, it means you can compose your posts somewhere more private than a cybercafe. A simple editor, like Wordpad for Windows, is usually the best to use. Save your posts as text files (After blogging, always remember to remove these files from your machine completely, using a tool like Eraser or Ccleaner which is is available in many languages and wipes temporary files automatically from all installed browsers and other applications).).
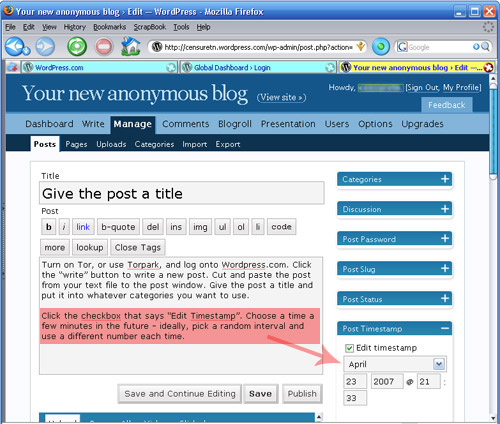
b) Turn on Tor, or use Tor Browser from your portable media drive, and log onto WordPress.com. Click the “write” button to write a new post. Cut and paste the post from your text file to the post window. Give the post a title and put it into whatever categories you want to use.c) Before you hit “Publish”, there’s one key step. Click on the blue bar on the right of the screen that says “Post Timestamp.” Click the checkbox that says “Edit Timestamp”. Choose a time a few minutes in the future - ideally, pick a random interval and use a different number each time. This will put a variable delay on the time your post will actually appear on the site - WordPress won’t put the post up until it reaches the time you’ve specified.Why?By editing the timestamp, we’re protecting against a technique someone might use to try to determine your identity. Imagine you’re writing a blog called “Down with Ethiopia Telecommunications Company!” Someone at ETC might start following that blog closely and wonder whether one of their customers was writing the blog. They start recording the times a post was made on downwithetc.wordpress.com and check these timestamps against their logs. They discover that a few seconds before each post was made over the series of a month, one of their customers was accessing one or another Tor node. They conclude that their user is using Tor to post to the blog and turn this information over to the police.By changing the timestamp of the posts, we make this attack more difficult for the internet service provider. Now they’d need access to the logs of the WordPress server as well, which are much harder to get than their own logs. It’s a very easy step to take that increases your security.
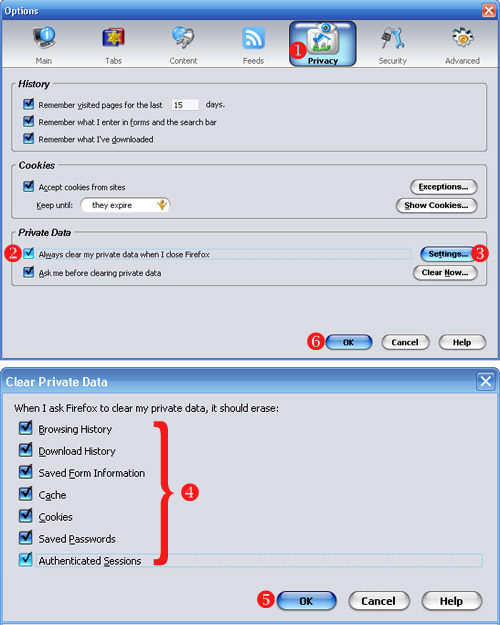
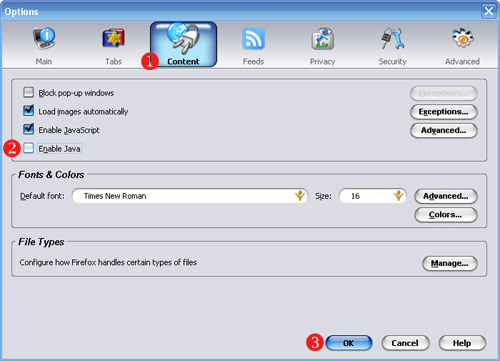
Step 5: Cover your tracksa) Securely erase the rough drafts of the post you made from your laptop or home machine. If you used a USB key to bring the post to the cybercafe, you’ll need to erase that, too. It’s not sufficient to move the file to the trash and empty the trash - you need to use a secure erasing tool like Eraser or Ccleaner which overwrites the old file with data that makes it impossible to retrieve. On a Macintosh, this functionality is built it - bring a file to the trash and choose “Secure Empty Trash” from the Finder Menu.b) Clear your browser history, cookies and passwords from Firefox. Under the Tools menu, select “Clear Private Data”. Check all the checkboxes and hit “okay”. You might want to set up Firefox so that it automatically clears your data when you quit - you can do this under “Firefox -> Preferences -> Privacy -> Settings”. Choose the checkbox that says “Clear private data when closing Firefox”. In case you cannot install programs on the computer, use the IE Privacy Cleaner tool from the USB stick to wipe temp browser data.Why? It’s very easy for someone to view the websites you’ve visited on a computer by reviewing your browser history. More sophisticated snoops can find out your browsing history by checking your cache files, which include stored versions of webpages. We want to clear all this data out from a public computer so that the next user doesn’t find it. And we want to eliminate it from our personal computer so that if that computer were lost, stolen or seized, we can’t be linked to the posts we’ve made.Some parting thoughts:- It’s not enough just to protect yourself when writing to your own blog. If you’re going to post comments on other blogs using your “nom de blog”, you need to use Tor when posting those comments as well. Most blog software records the IP a comment came from - if you don’t use Tor, you invite whoever runs that site to track your IP address back to your computer. Tor’s like a condom - don’t practice unsafe blogging. - Just because you’re anonymous doesn’t mean you shouldn’t make your blog pretty. The “Presentation” tab in WordPress has lots of options to play with - you can pick different templates, even upload photos to customize some of them. But be very, very careful in using your own photos - you give a lot of information about yourself in posting a photo (if the photo was taken in Zambia, for instance, it’s evidence that you are or were in Zambia.)- If you’re really worried about your security, you might want to go a step further in setting up your Firefox browser and turn off Java. There’s a nasty security bug in the most recent release of Java that allows a malicious script author to figure out what IP address your computer has been assigned EVEN IF YOU ARE USING TOR. We don’t worry too much about this because we don’t think that WordPress.com or Google are running these malicious scripts… but it’s something to seriously consider if you’re using Tor for other reasons. To turn off Java, go to “Firefox -> Preferences -> Content” and uncheck the box for Enable Java.- If you’re the only person in your country using Tor, it becomes pretty obvious - the same user is the only one who accesses the IP addresses associated with Tor nodes. If you’re going to use Tor and you’re worried that an ISP might be investigating Tor use, you might want to encourage other friends to use Tor - this creates what cryptographers call “cover traffic”. You also might want to use Tor to read various websites, not just to post to your blog. In both cases, this means that Tor is being used for reasons other than just posting to your anonymous blog, which means that a user accessing Tor in an ISP’s server logs doesn’t automatically make the ISP think something bad is taking place.A final thought on anonymity: If you don’t really need to be anonymous, don’t be. If your name is associated with your words, people are likely to take your words seriously. But some people are going to need to be anonymous, and that’s why this guide exists. Just please don’t use these techniques unless you really need to.Show your support!

 Найдено: Kate and Will engagement rumour #146
 Найдено: Check out Prince William wearing a 5.11 hat

 Найдено: Playful prince on the prowl: If you're going to indulge in some horseplay with royal cousins, where better than Gatcombe Park?